| If you have found the information on this site or on my youtube channel helpful and wish to donate you can by clicking the
donate button below |
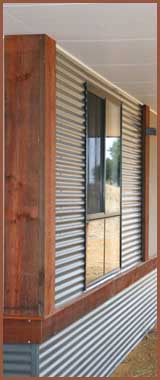
Exterior Stains are slightly different, most are
an oil with stain added. Generally two coats are applied with no
need to apply a clear top coat. |
|
|
| |
Staining wood is easy to do if you take a few
precautions before you start, I will go through the process of
how to stain and give you the information you need to choose the
type of stain you would like to use. There are a few
different types of wood stains that you can use,
the most common is a pigment stain either in water or solvent
based. Also there are stain-varnishes, this is a varnish with
the stain already added and there are pro's and con's for all the
different products out there. |
|
| |
Stain varnishes are exactly like how they
sound, a varnish with a stain already included and can be a
little more difficult to work with. The reason for this is
because over lap marks can and will stand out as darker spots.
Using a door as an example, lets say you apply it to the insert panels
first and get the smallest amount on the face of the door and
don't wipe it off, when you come to painting the face of
the door it can stand out as a dark spot. I hardly ever use them for this reason, its too
easy to make mistakes but I have seen some doors stained this
way before and they looked excellent. |
|
| |
Pigment stains are either water or solvent
based products and general these stains are very thin in
consistency which makes them easy to apply. You still need to be
a little cautious with over lap marks but they are easy to
remove while stain is still wet. I don't use water based stains, personally I only ever use solvent based stains and there is
one main reason for this. The reason being is that water can raise
the grain in wood, so once you have applied the stain to your wood it may become furry which is not good. A friend of mine
many years ago sanded his wooden floor boards then applied a water
base stain, when it was dry the floor was rougher then when he
started. There is a second reason for using a solvent based
stain and that's because it stays wet longer giving you more
working time to get rid of any over lap marks. |
|
|
The first thing is making sure you have the
correct
colour stain you require and its wise to try a sample first.
All wood varies in density therefore some wood will
absorb more stain than others so its important you try your
sample on the same type of wood you will be staining. If
you're having a hard time finding the right colour I would
suggest taking a sample of the wood to your paint shop and
ask if they could put a few different sample colours on
there for you to choose from. They should do this at no
cost. |
|
|
Preparing your timber is very important, if you get this
right
then every thing else should just fall in to place. To prepare
wood is simple as sanding it smooth and removing any marks or
stains, some stains may need to be removed with a wood cleaning
solution. If you are unsure if you have remove all the marks etc
get a lint free rag and some turpentine, wipe the wood with
the rag slightly moistened with turps. This will bring out the
colour in the timber and any marks that you missed should
show out. If you were wondering what the timber would look like
in its natural state, wiping with a turps rag will show you the
natural look of the wood. I use turps rather then water as
water can raise the grain of the timber. |
|
|
Once you are happy with the look of
your timber its time to apply the stain, make sure the
surface has been dusted off and you can use a turps rag to
remove dust also, I often use this method instead of a tact
cloth. There are two ways in which you can apply the stain
and it will be up to you which method you use.
The first method is by using a rag (lint free), gently
dip one scrunched up corner of the rag into the stain and
try to use the same part of the rag for every dip in to the
stain. Once you have stain on your rag just start applying
it but don't try to stretch it out too far, it is a mistake a lot of people make,
give it a good dousing. Apply in
a circular motion and remember to start at one end and work you way along,
don't start in the middle, depends on what you are staining
there should always be cut off points for you to stop and start
from. After about five minutes you will need to go back and wipe
over what you have done with a clean rag to remove any excess
stain this will leave you with an even finish and remember to use a
lint free cloth.
|
|
| |
The other method is to apply the stain by brush, I find this
the best method because it is easier to get in to corners with a
brush and in general you can apply more stain this way. The only
difference between staining this way is that you will be using a
brush to apply the stain and all other processes are the same.
|
|
|
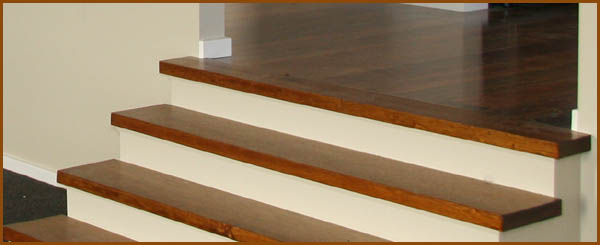
Once you have finished your staining
you will need to apply a coat of clear, either varnish or
polyurethane, without a coat of clear the stain will slowly
be worn away with wear and tear. There are a few
important things to remember, do not sand at this stage if
you do you will risk sanding through the stain and leaving
it looking uneven. If you feel you need to sand only use a
very fine sand paper, like 240 grit, I generally only dust
off before applying the clear. When you are applying the
clear try to get an even coat over the entire area and check
for any misses as you go. Once this coat is dry then it will
be time to sand but be careful not to sand through the
clear. When you are happy that the surface feels smooth dust
off and apply a second coat of clear. Some people will apply
a third coat for extra durability and this will also help
fill in the grain of the timber leaving a smoother looking
finish. |
|
| |
How To Apply Stain Varnish |
|
| |
Prepare your wood the same as if you where
going to stain. Before you apply the stain varnish you
will need to seal the wood first, the product that I use is
called sanding sealer, its basically a clear but it has good
sanding properties. Apply one coat sanding sealer and when dry you will need to sand the timber smooth as
like stain you can not sand the stain varnish or it could end up
looking uneven. When you have finished sanding, dust off and use
a turps rag if required then you will be ready to apply the
stain varnish. Applying stain varnish is like applying any
clear but you will need to take extra caution with over lap
marks and try to apply evenly as think areas will show up darker
and thin areas lighter. When the first coat has dried you can
lightly sand using a fine grit sand paper but do not sand
through the coating. Apply your second coat and your done,
generally two coats will be fine, you may even be happy with
just one coat but I would suggest you apply a coat of clear over
this for durability. |
|
|
|
|